AC-Catches.com
Catching Fish and Bugs in Animal Crossing: New Horizons
Like many people during the COVID-19 pandemic, I’ve spent longer than I should have playing the new Animal Crossing: New Horizons for Nintendo Switch. Being a completionist and perfectionist, I’ve been trying to catch every fish and every bug in the game. But I was disappointed with most online lists of the fish and bugs and their available times: there was no easy way to sort and filter the lists by various criteria. On the last day of the month, I really need to know what’s available today but not tomorrow. Or maybe I’m just out to make some bells today, and I want to know where to fish to get the most bang for my buck.
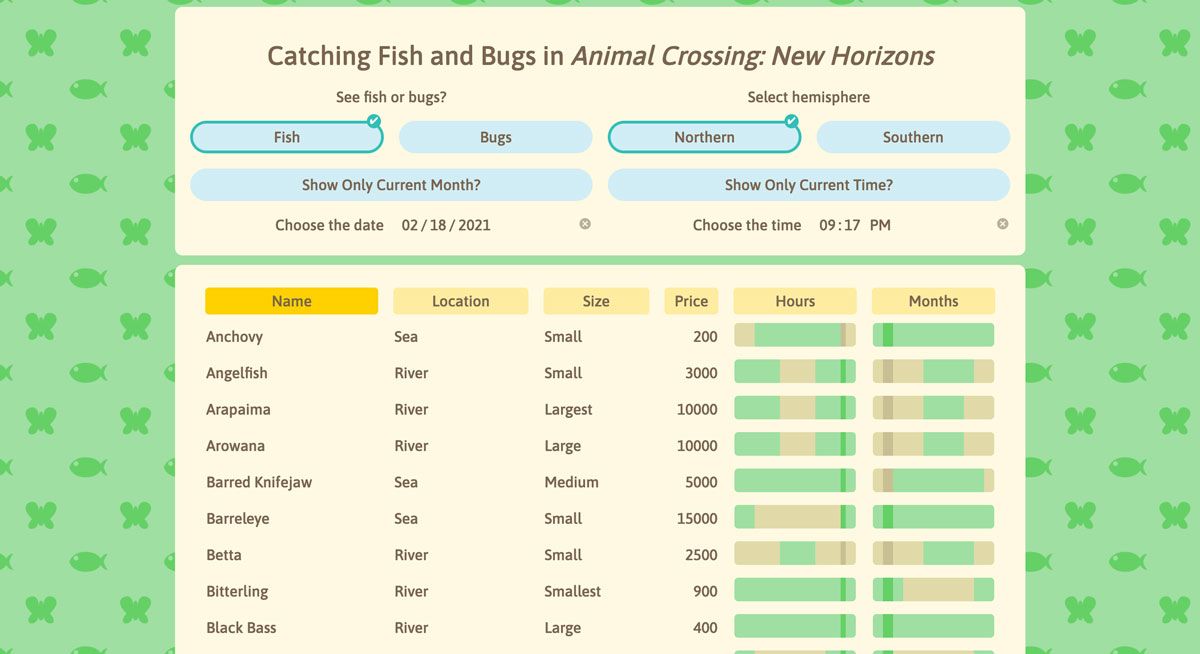
Dissatisfied with existing static tables, I set out to build my own tool in React which I’ve made available at ac-catches.com.
Go to AC-Catches.comCollecting Data
For my data source, I used Polygon’s tables for fish and insects. These tables are sortable, but have two problems. The first is that while you can “sort” based on time and month available, these sorts really don’t make sense. “August” comes before “Year-round” alphabetically, but that really isn’t helpful information for a catcher like myself. Second, you can’t filter the table to, for example, exclude presently unavailable catches. I would spend too much time scanning each entry to see what was or wasn’t currently catchable on my island. This was the pain point that inspired my tool in the first place.
If I were expecting these tables to get lots of updates, I might have written a scraper to regularly download and parse the information. But I expect this information to be static, and there’s really not that much of it, so I opted to clean it by hand. Not fun, but doable. Kept things simple.
I had to decide how I wanted to represent time data to make it useful. Using a humable-readable string of the form “4 a.m. - 8 a.m., 5 p.m. - 7 p.m.” wouldn’t work to make the tool I needed. I realized I could fairly simply represent times and months of availability in a single string of n and y. So the months available string for a Peacock Butterfly (March through June in Northern Hemisphere), I’d end up with nnyyyynnnnnn. I chose to encode all month times as Northern Hemisphere, deciding to use code in the app to shift them by 6 months if Southern Hemisphere were toggled on.
In the end, I created two CSV files (fish.csv and bugs.csv) that looked like this:
name,location,size,price,hours,months
Bitterling,River,Smallest,900,yyyyyyyyyyyyyyyyyyyyyyyy,yyynnnnnnnyy
Pale Chub,River,Smallest,160,nnnnnnnnnyyyyyyynnnnnnnn,yyyyyyyyyyyy
Crucian Carp,River,Small,160,yyyyyyyyyyyyyyyyyyyyyyyy,yyyyyyyyyyyy
and,so,on,and,so,forth...
With this data simply encoded, I can create easy-to-read graphics showing exactly when catches were available. No more reading through text of the times and months!
When the main app component loads, a useEffect hook fetches the CSV files with axios, the results are parsed with d3-dsv, and they are set to the appropriate state values from which the tables will be generated.
Using TypeScript
This was my first React project using TypeScript instead of regular JavaScript. TypeScript is all the rage, and I can see why. Using a typed language has advantages. Better auto-completion in VS Code can really speed things up and clarify what your various functions are doing. I’m sure I avoided a lot of bugs (in my code, not in Animal Crossing) this way.
But ultimately, using TypeScript cost me more time than it saved. I was constantly finding myself tweaking interfaces and doing weird arcane tricks to silence the complier’s screams. I felt like I was writing a lot of boilerplate code.
Maybe most annoying was writing a declaration file for Styled Components (styled.d.ts) in order to use a theme. Every time I wanted to add to or subtract from my theme, I’d have two files to edit instead of one and would need to restart the app.
// styled.d.ts
import 'styled-components';

declare module 'styled-components' {
	export interface DefaultTheme {
		backgroundColor: string;
		containerBackgroundColor: string;
		// ...
	}
}

// Theme.ts
import { DefaultTheme } from 'styled-components';

export const Theme: DefaultTheme = {
	backgroundColor: 'rgba(238, 231, 185, 1)',
	containerBackgroundColor: 'rgba(255, 249, 227, 1)',
	// ...
};
The experience was irritating, and it did not feel like my code was better as a result of this extra work. I think TypeScript makes more sense on a large collaborative project, but for a simple React app like this it was a hindrance.
Styles and Animation
Styling this tool was the most fun part of building it. I tried to emulate the style of the user interfaces within the game itself, taking inspiration from the apps on the Nook Phone, the Nook Stop, and the crafting table interface.

As I mentioned earlier, I used Styled Components for my CSS. I’ve been a convert to CSS-in-JS for a few years now. It’s a lot easier to keep track of things by grouping code by component rather than filetype.
The times and months are represented in the table with canvas elements. I originally tried SVG, but there were so many nodes that performance was suffering. This prompted me to use canvas for the first time.
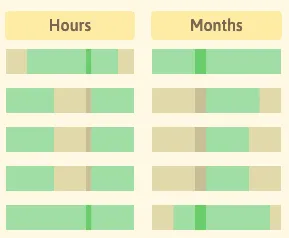
Each time string is split, and then a canvas rect is drawn and colored according to the value of that piece of the string and the current time. Here’s the complete component code:
import React, { useEffect, useRef } from 'react';

interface ITimes {
	times: string;
	currentTime: number;
}

export const Times = ({ times, currentTime }: ITimes) => {
	const ref = useRef<HTMLCanvasElement>(null);
	// The final dimensions will be 100x25,
	// but here I scale them up so the width
	// is evenly divisible by the length of the
	// times string; this prevents visual artifacts
	// from fractions of pixels. I scale it back
	// down with inline CSS.
	const height = 60;
	const width = 240;

	useEffect(() => {
		if (ref && ref.current) {
			const canvas: HTMLCanvasElement = ref.current;
			canvas.width = width;
			canvas.height = height;
			const ctx = canvas.getContext('2d');
			// Using string length to divide width, I can use
			// this component for times of day and for months.
			const count = times.length;

			if (ctx) {
				times.split('').forEach((time, i) => {
					const color =
						time === 'y'
							? i === currentTime
								? 'rgba(105, 206, 107, 1)' // color if available now
								: 'rgba(161, 222, 164, 1)' // color if available at time `i`
							: i === currentTime
							? 'rgba(200, 190, 150, 1)' // color if unavailable now
							: 'rgba(225, 217, 170, 1)'; // color if unavailable at time `i`
					ctx.fillStyle = color;
					ctx.fillRect(i * (width / count), 0, width / count, height);
				});
			}
		}
	}, [currentTime, ref, times]);

	return <canvas style={{ height: '25px', width: '100%' }} ref={ref} />;
};
And here is the result: rows of easily scanable times and months! You can see how the current time and month cut through each canvas element, making it easy to see what’s available at the exact moment.

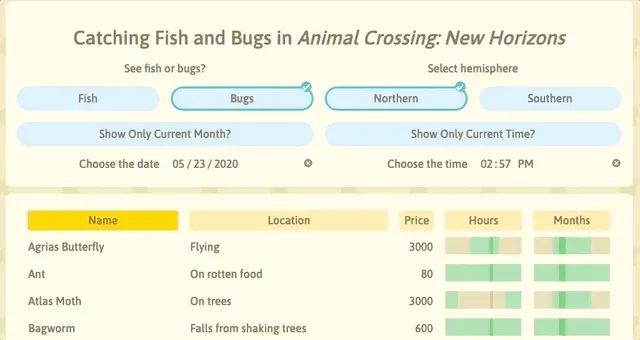
I also used Framer Motion for the first time to add a little bit of animation to parts of the tool. This helps to give it a friendlier feel closer to the UI in Animal Crossing itself. You can see a bit of this animation when new tables pop in as you switch between fish and bug views.

Result
This was a fun little project. It gave me a chance to play with some things that were new to me (TypeScript, Framer Motion, and canvas) while also experimenting stylistically. And I have an easier time finding fish and insect in Animal Crossing, too!
If I keep working on this, I may refactor the app to use React context and a reducer. Currently there’s a lot of top-level state and too much prop-drilling. Effective, but ugly. I’ve also since started playing with xstate for finite state machines, which I find very elegant. I think it would work very well for powering the tool’s options’ state.
If you’d like to play with the tool, it’s available at ac-catches.com. And the code is available on GitHub. Feel free to check it out, or even contribute!
And good luck to you with catching those fish and bugs!